
Elena Canorea
Communications Lead
If in the first part of this article I told you what design systems are, some definitions, and their advantages, in this second part I will guide you through the process of creating design systems.
Okay, we are clear that we need to build a design system for our digital product, but where do we start? Well, I have identified a series of steps to carry out all this more or less affordable, adaptable and realistic depending on the type of company you are in:
We will explain and develop them one by one to make them clearer.
This is, necessarily, the first step that we will have to take to face the creation of a design system. Select the person/s who will be part of the team according to their skills and perform specific tasks to create the design system.
In this sense, we can identify a series of profiles that would form the ideal team. They would be the following:
It is possible that, depending on the size of the company we are in, there are people who embody more than one of these roles. Or it may even be a UX/UI designer and a developer who carry all the weight and then have to iterate with other more business-oriented roles… I repeat, all this will depend on the type of company, corporate culture, etc. where the phrase “this is how we play in my house” makes a difference.
It is also important to determine how this team relates to itself and to the rest of the teams or people in the company. In this case, we can identify these governance models:
A single person is the one who works and decides on the design system and “imposes” his decisions on the rest of the organization.
Solitary Model
A single team keeps the design system working full time.
Centralized Model
People from various teams come together to manage and govern the system.
Federated Model
A core team and members of other teams join together to manage and govern the system.
Cyclical Model
All these governance models have their advantages and disadvantages, e.g.:
Once the team is formed and we have decided on the best working model for our organization it is time to identify the patterns of behaviors and, therefore, the components we will need to develop in our design system.
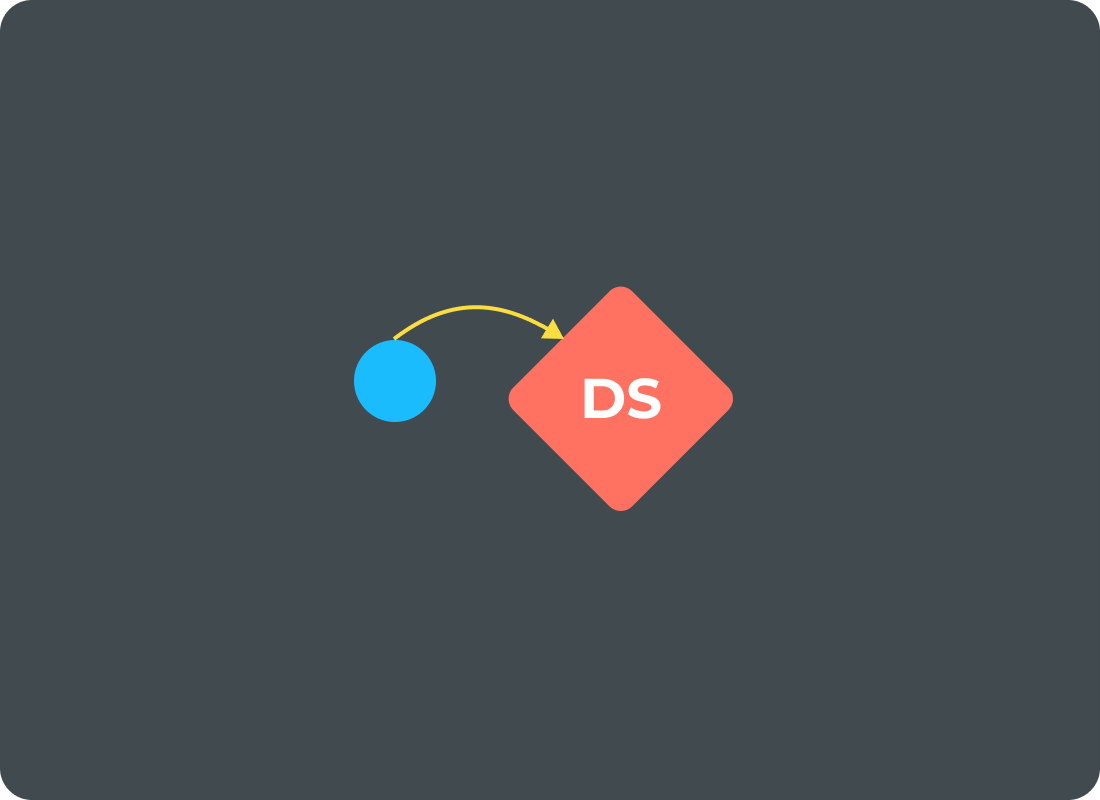
One way to gather valuable information is to conduct user research:
This is an opportunity to get to know the users and determine how they intend to use the system. This does not need to be a formal investigation, but rather a discussion with the users to learn about their workflows and problems and how the design system might solve them.
If the design system is for a new product, we are in luck. Still, if it already exists, we have no choice but to make an inventory of all the visual elements (colors, typographies, grids), components, interactions, etc. to make decisions and include only those elements that we consider essential.
On many occasions, before the advent of design systems, it was possible to use duplicate components with different aspects or to have 20 shades of gray. This inventory is very useful for making a rational selection and deciding, for example, that with eight shades of gray, we really have enough values to be versatile in design.
Suppose the design system you need to build is based on a web product. In that case, some tools automate the creation of the inventory as CSS Stats where all this that we have discussed is evident, and you can see “our embarrassments” of months or years of including design elements without control.
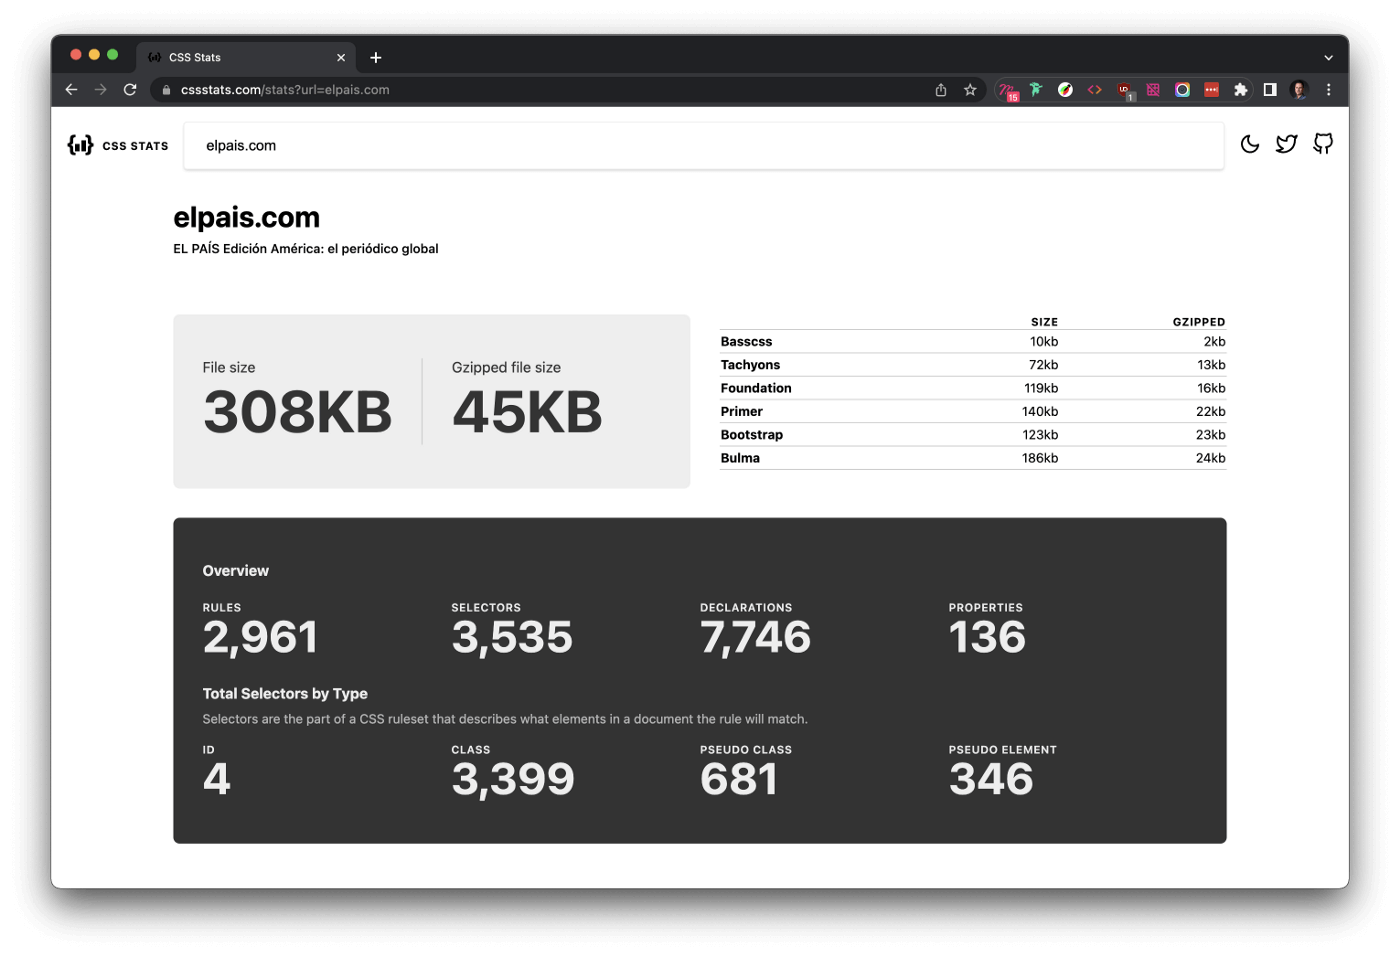
Vision of http://www.elpais.com/ at CSS Stats
In this third step, we begin to enter the process of building the design system itself. Let’s get to it.
Design systems are also known as “single source of truth” since they contain all the peculiarities of a digital product in a unified way, and we, at Plain Concepts, materialize all this in a Figma library.
This library should represent design principles that are the rules that guide teams to make meaningful design decisions. They reflect the organization’s shared beliefs: how it thinks, what it believes in, and how it relates to the people and environment around it.
To better understand design principles, I will give a hypothetical example: imagine that ONCE commissions us to develop a design system for a new digital product. One of its undisputed design principles must be accessibility, so its design system must represent this principle at all levels. That is why, when we build the design system, we will have in mind several aspects such as the high contrast of colors, the size of the fonts, and the size of the components that should be larger compared to those of other products where this principle is not taken into account.
Having the design system contained in a Figma library gives us some advantages:
On the one hand, all those elements that are configured through styles, such as text, color, shadows, effects, spacing, grids, or layouts if necessary…, and on the other hand, the set of components that our digital product needs.
As for the nomenclature of these components, we have a reference in Component Gallery so you can orient yourself when naming the components you need to create. But it is only a help, be original and create your own language, your way of calling things. A design system is about creating a common language within a team.
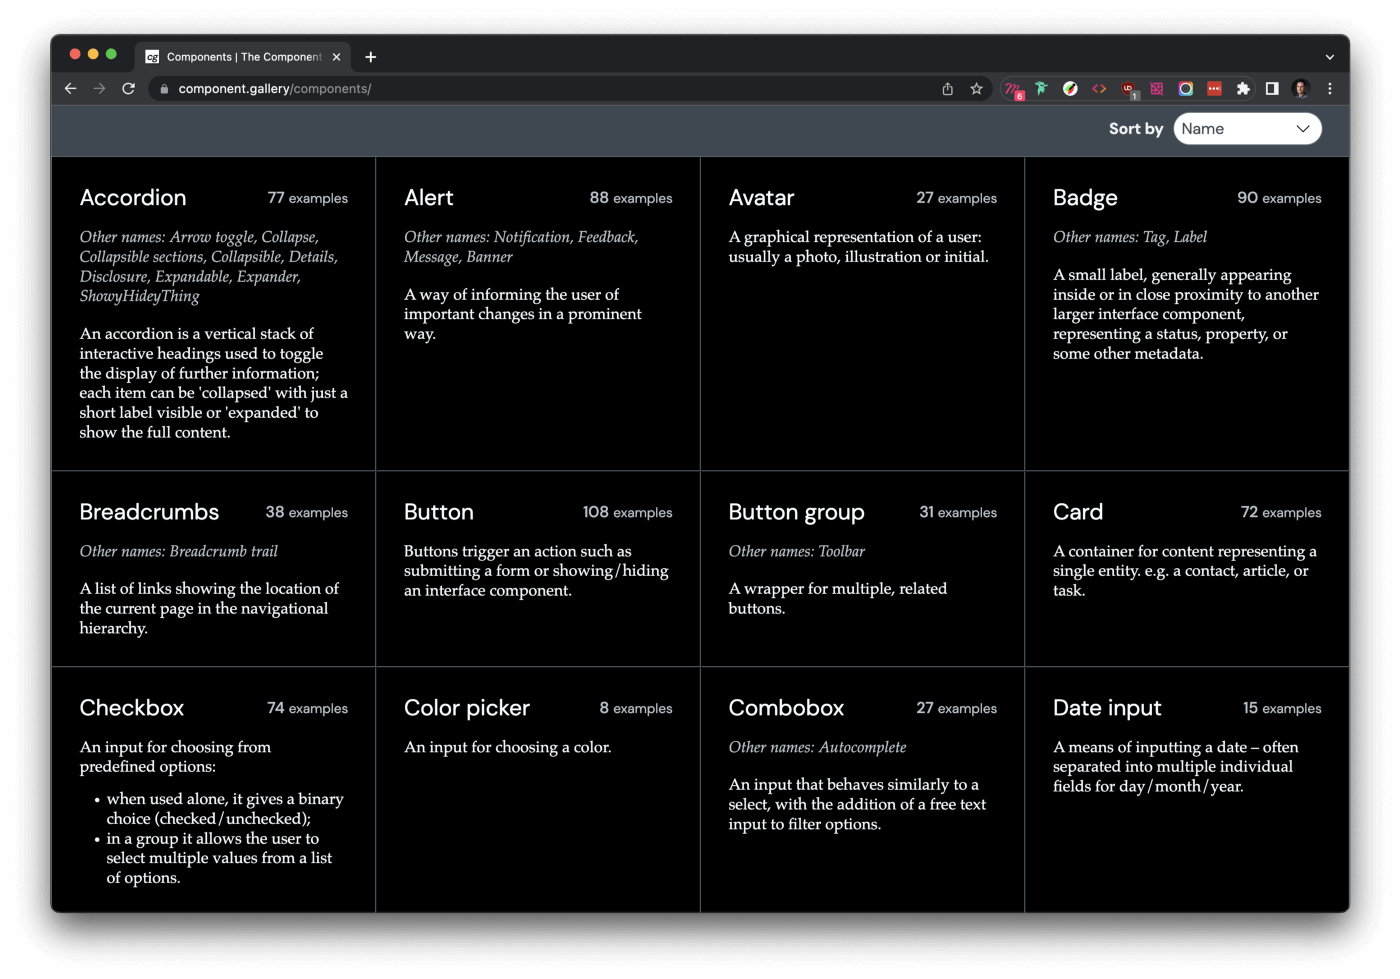
Component Gallery website
Once the design system is built with its styles, components, and other elements, we have to document it, which is basically describing in detail how the styles and components of the system work and behave so that all team members are clear about it.
I see two possibilities:
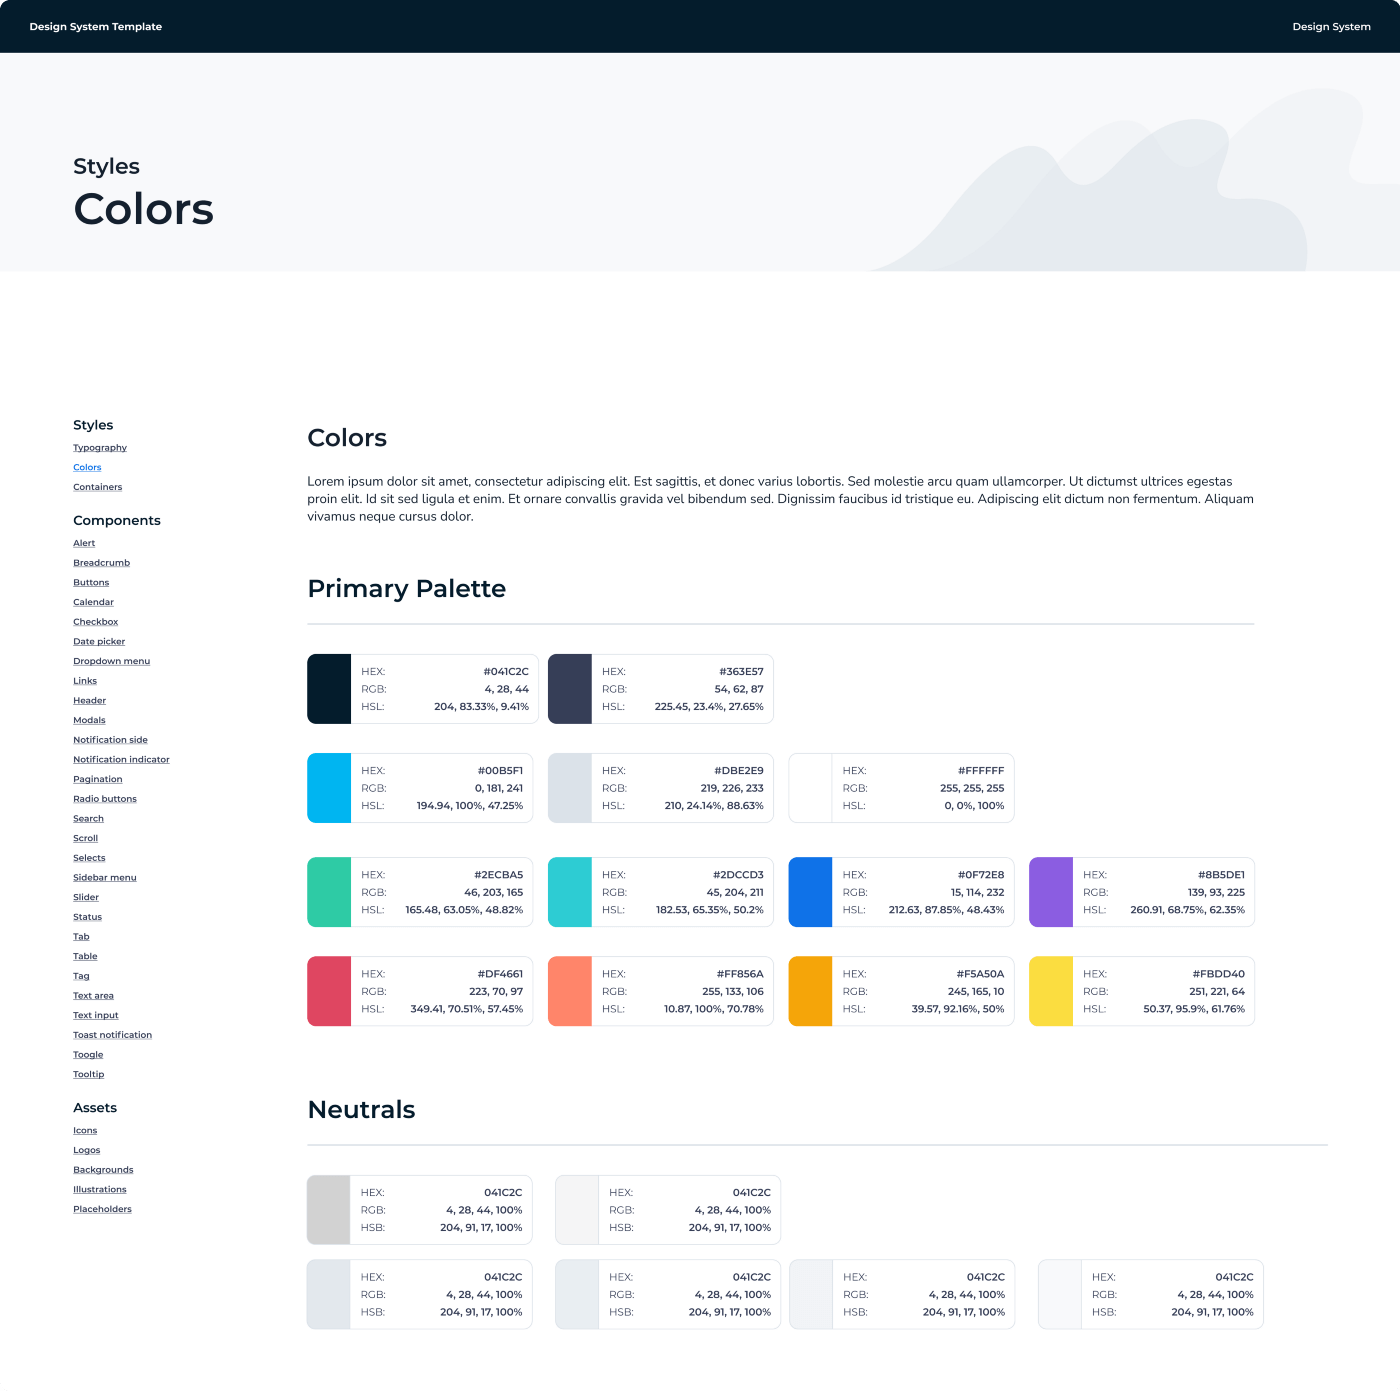
Example of ad hoc documentation in a Design System
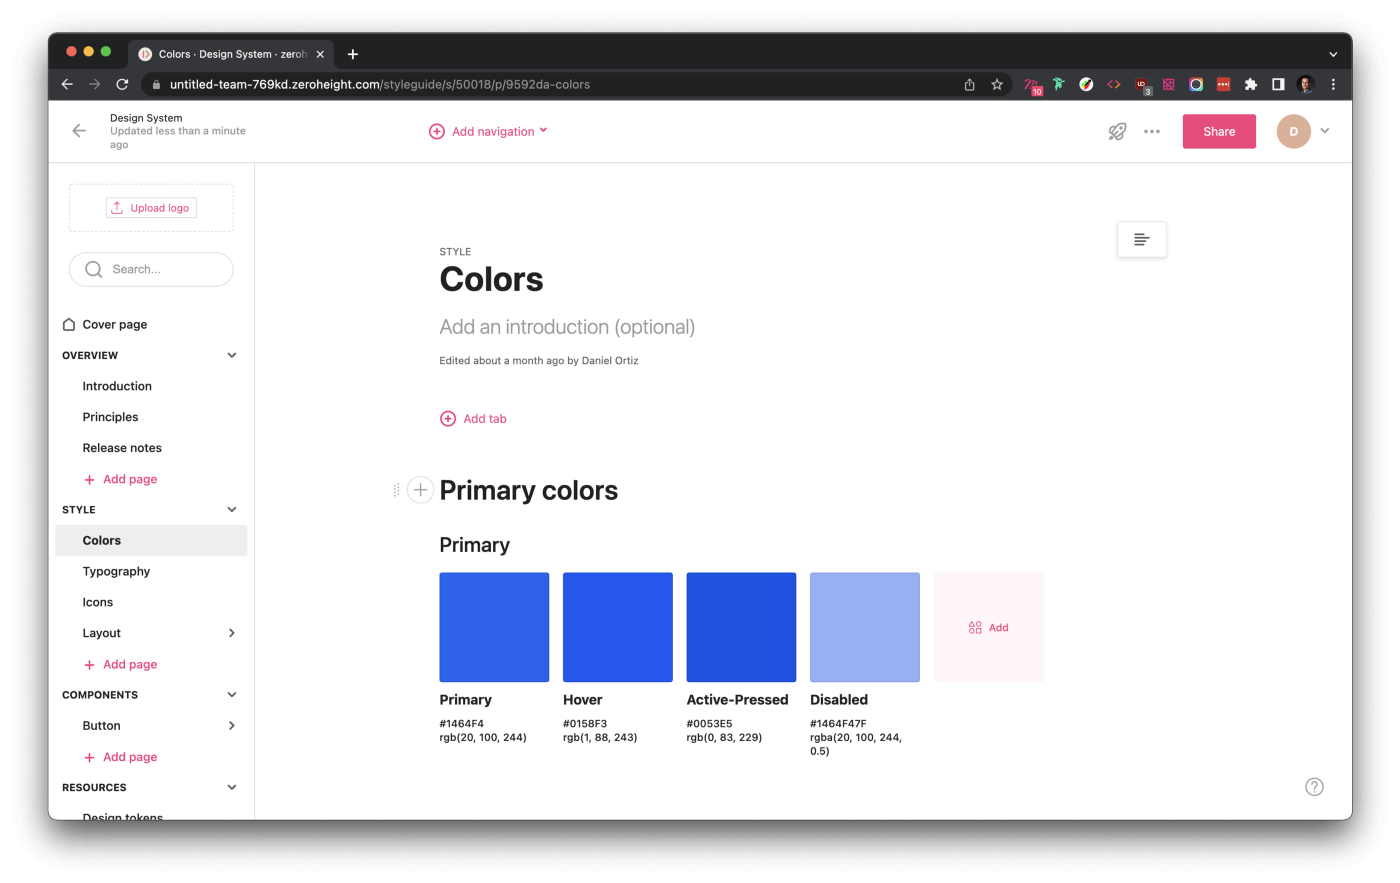
Example of a documented design system in zeroheight
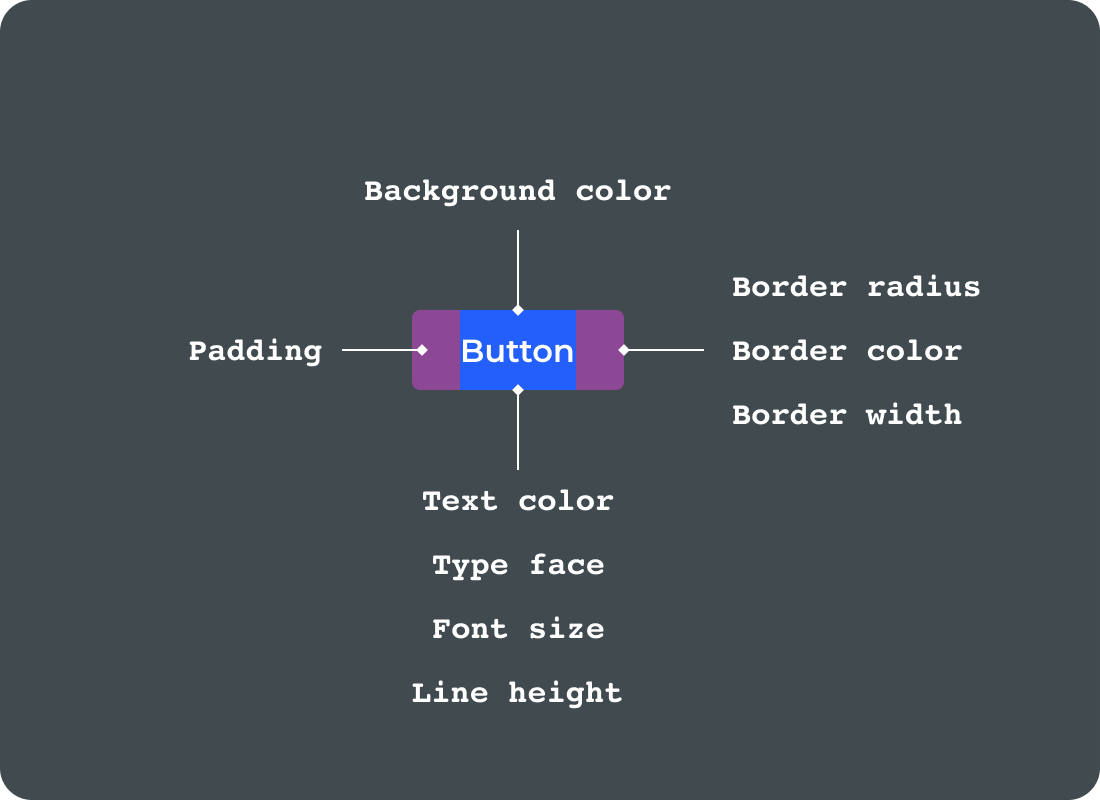
The next step in turning our design system into something more tangible would be to “tokenize.”
And what is tokenization? It is converting into code, regardless of the language used, each of the design decisions that have been made in the system, such as the value of a color or font size or the rounding of corners, and so on.
Both design and development can integrate these “Design Tokens,” so both teams will work with the same building blocks. The idea is to build a common language shared between design and development.
From design, we will need to integrate with the development team to see the most efficient way to do it and automate it so that changes in the design system are automatically reflected in the code tokens.
Design Token
Thanks to the power of Figma and its web-based API, we can find some plug-ins that make possible a friendly transformation of our design items into code tokens, but it will be the developers who decide what the best way to do it for each project is.
At Plain Concepts, we have had good experiences generating tokens with Jan Six’s Figma Tokens plug-in and, subsequently, using Style Dictionary to translate the initial code generated by the plug-in into the syntax needed (css, sass, less, NodeJs, etc.). Describing this process could be interesting in a separate article 😛
Acting in this way is particularly useful and agile when we design thinking about themes (Dark / Light) or customizing a white label product.
Measure effectiveness and maintain
How do we know that what we have built in the design system is useful?
A design system is successful when users can use it independently without relying on the team that created it. In other words:
“Give a man a fish, and he will eat today. Give him a rod and teach him to fish, and he will eat for the rest of his life.”
To measure the effectiveness of a design system, we have two main sources of information:
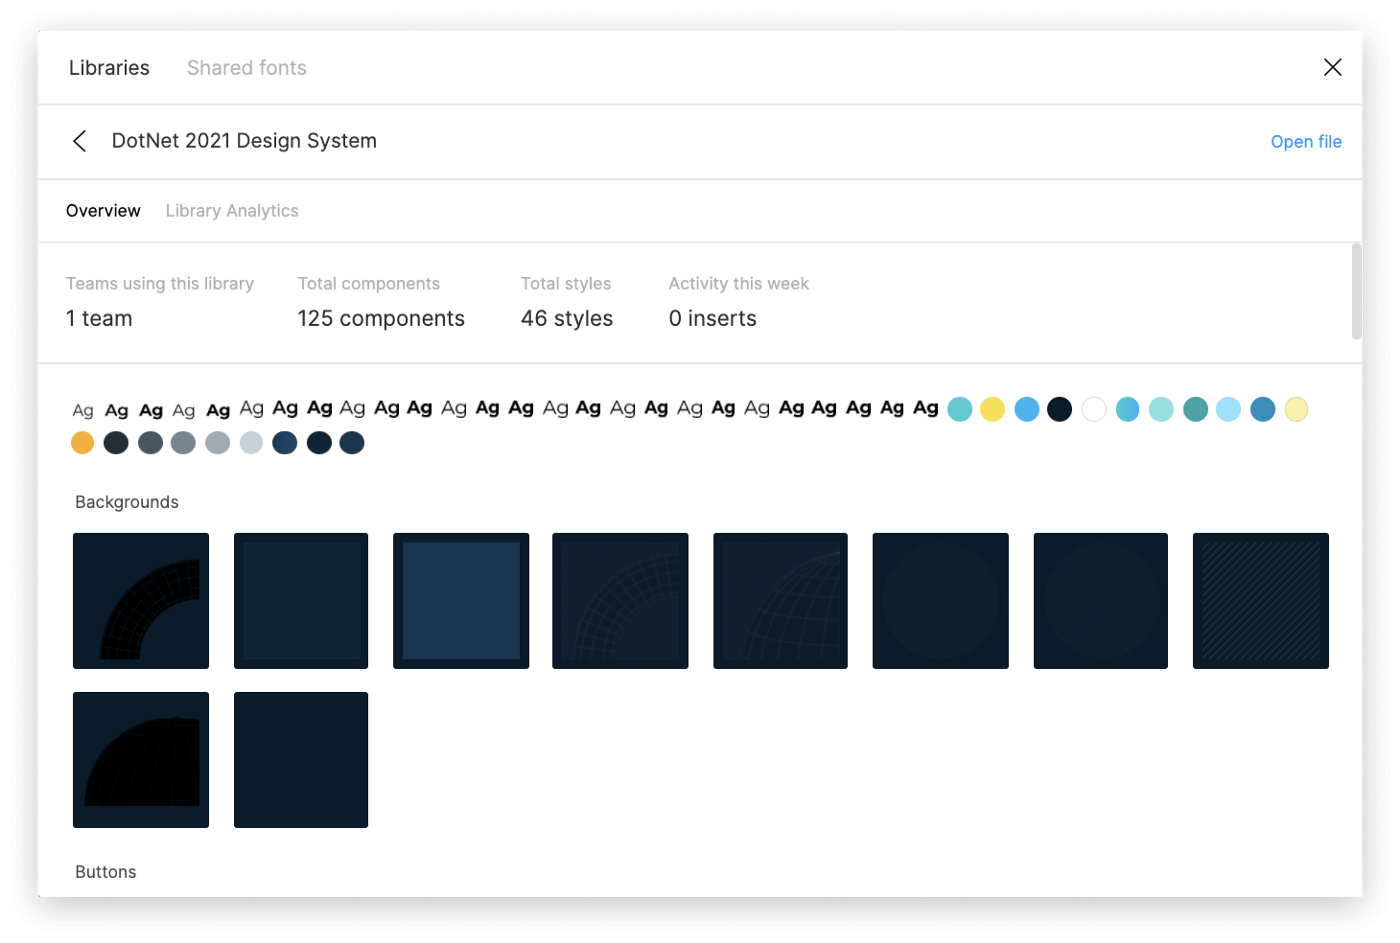
Design System Analytics of Figma
Based on the information obtained in both cases, we will have to iterate to execute the necessary improvements and adapt the design system to the changes in the environment and the user to make it as efficient as possible. We will do this as many times as necessary, as required by both internal and external conditions. This is what is reflected in the Kaizen philosophy, which literally means “constant improvement”.
This term comes from the Japanese car company Toyota, where any factory employee could stop the production line if he saw something suspiciously defective or that did not meet the brand’s quality standards, think of a solution and execute it to restart production again.
This same concept and way of acting have been picked up by Lean methodologies that have amply demonstrated their effectiveness in the development of digital products.
Another exciting aspect to consider when measuring the effectiveness of our design system and making decisions about it is when our digital product has a clear objective of converting business KPIs. That is when the goal is to generate sales or obtain leads.
At this point, CRO (Conversion Rate Optimization) experts work closely with the design team to produce the necessary changes or adaptations to achieve particular objectives.
A possible hypothetical example that we could find would be that the marketing department wants to test how a new layout of an image would work in a product template by changing it from left to right.
At this point, we should create an A/B test with two designs launched to 50% of the users to compare their reaction and measure which of the two versions is more effective and, therefore, execute a change in our design system permanently based on the results obtained.
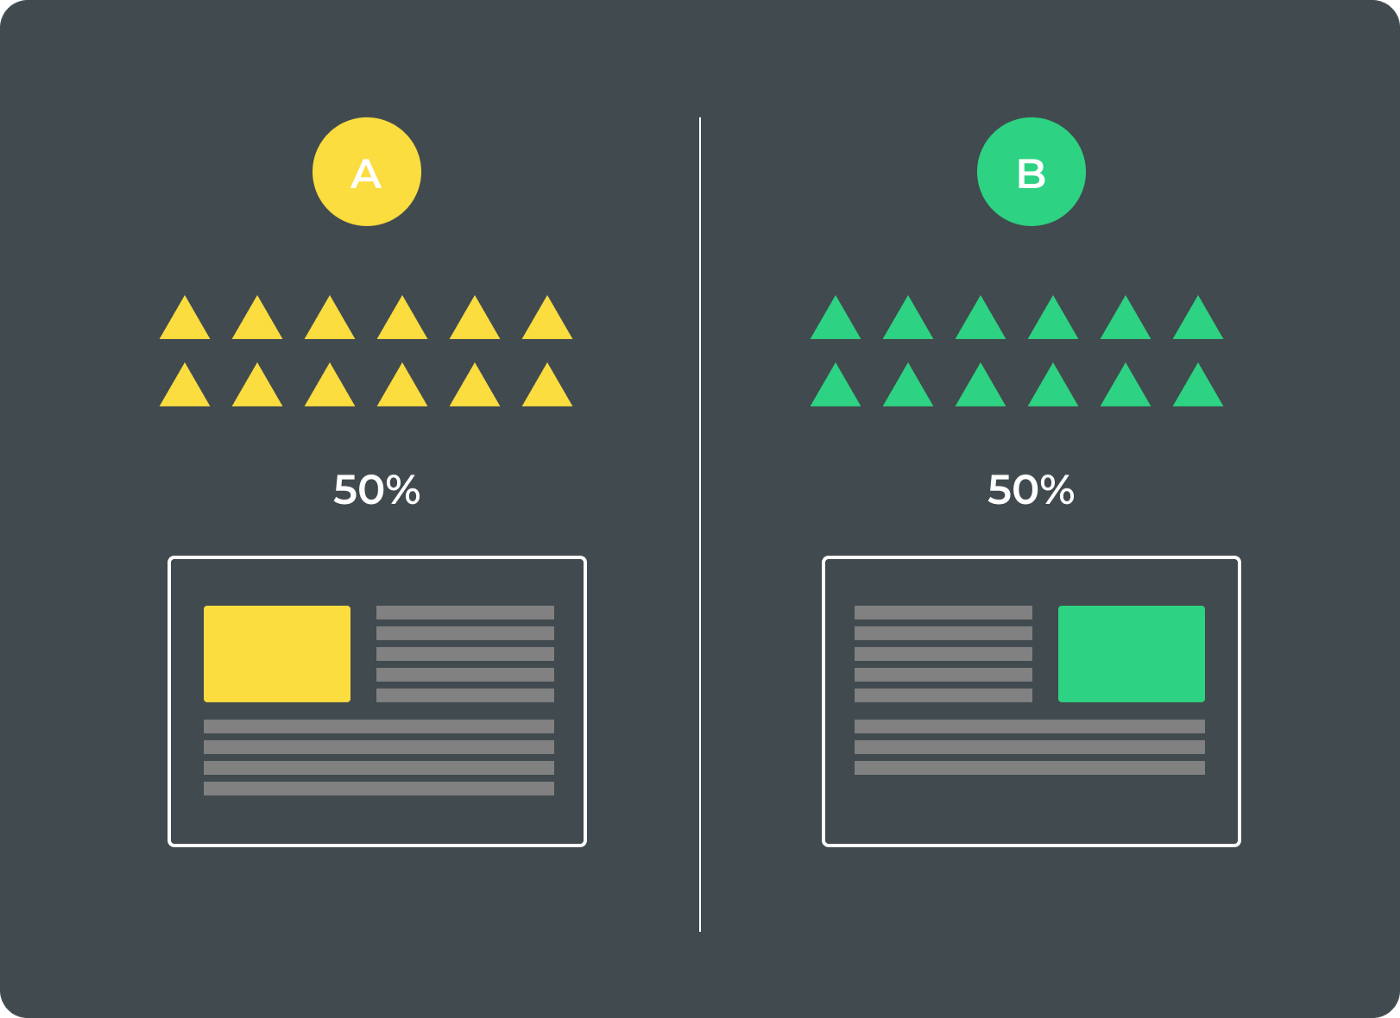
Test A/B
This same experiment could be run on any aspect of our design system. Namely: typographies, colors, buttons, etc.
Design systems have value and help generate benefits.
As we have seen in the previous point, two of the indicators to measure the success of a design system were both its use and metrics based on business KPIs.
At this point, we are going to focus on economic value. We are going to measure how much time we save and, therefore, how much money we save by using a design system. Although, in many companies, it is still difficult to admit it, adopting and implementing a design system as a methodology leads us to directly obtain specific data that overwhelmingly indicate that its use generates efficiency in the processes (reuse of components, reduction of onboarding times of a new designer, agility in changes, etc.)
It is interesting to show this data to the management and/or customers to demonstrate the value of the design system and get them to continue investing in it and betting on it as a methodology to face the creation of digital products.
In general terms, the result of our calculation will be as follows:

This process measures the value of the system during the design phase. We do not include the development part, so the savings in time and money will be even more significant.
Let’s start by defining the value of a component in terms of time (hours) and cost (euros €):
Time (hours) = time from when you receive the requirements until you get the final approval and upload it to the system.
Cost (euros €) = average hourly cost of a designer x the number of hours spent.
Now, we will define the number of unique components in a design file delivered to development.
35 unique components (an approximate average)
35 x 7 hours = 245 hours
28€/hour x 245 hours = 6.860 €.
That 6,860 € represents the total value of an average design system (about 35 components). That is, that amount is what we would save in an average company having developed a design system to build a new product.
I hope this article has served as a little how-to book, more or less general, to encourage teams that have not yet embarked on creating design systems (if there are any left).
At Plain Concepts, we have driven the development of design systems in our clients to help them deal with their own digital transformation processes in an agile way. We have made them see the need for its adoption as something intrinsic in their own culture, not only for cost efficiency purposes, but also as a methodology that came to establish itself as a fundamental pillar without which, today, you can not build digital products … And the best: they have thanked us for it 🙂
Elena Canorea
Communications Lead
